If you’re like me then you’ve recently been spending more time at home than normal, and you’re wishing you were out boating instead! I have some trips planned this summer on the water - trip plans I intend to turn into reality in the near future. One of the silver linings of all this time at home is the opportunity to thoroughly research and explore the routes and destinations online. I recently discovered a very powerful tool for planning boating adventures from home - the Navionics ChartViewer (Navionics WebApp).
What It Is - like Google Maps for Boating
I found the Navionics ChartViewer when I was researching a trip from the Columbia River Bar to Lewiston Idaho via the Columbia and Snake Rivers (this trip will be the subject of a future article or articles - 400 miles inland through three states and eight locks!).
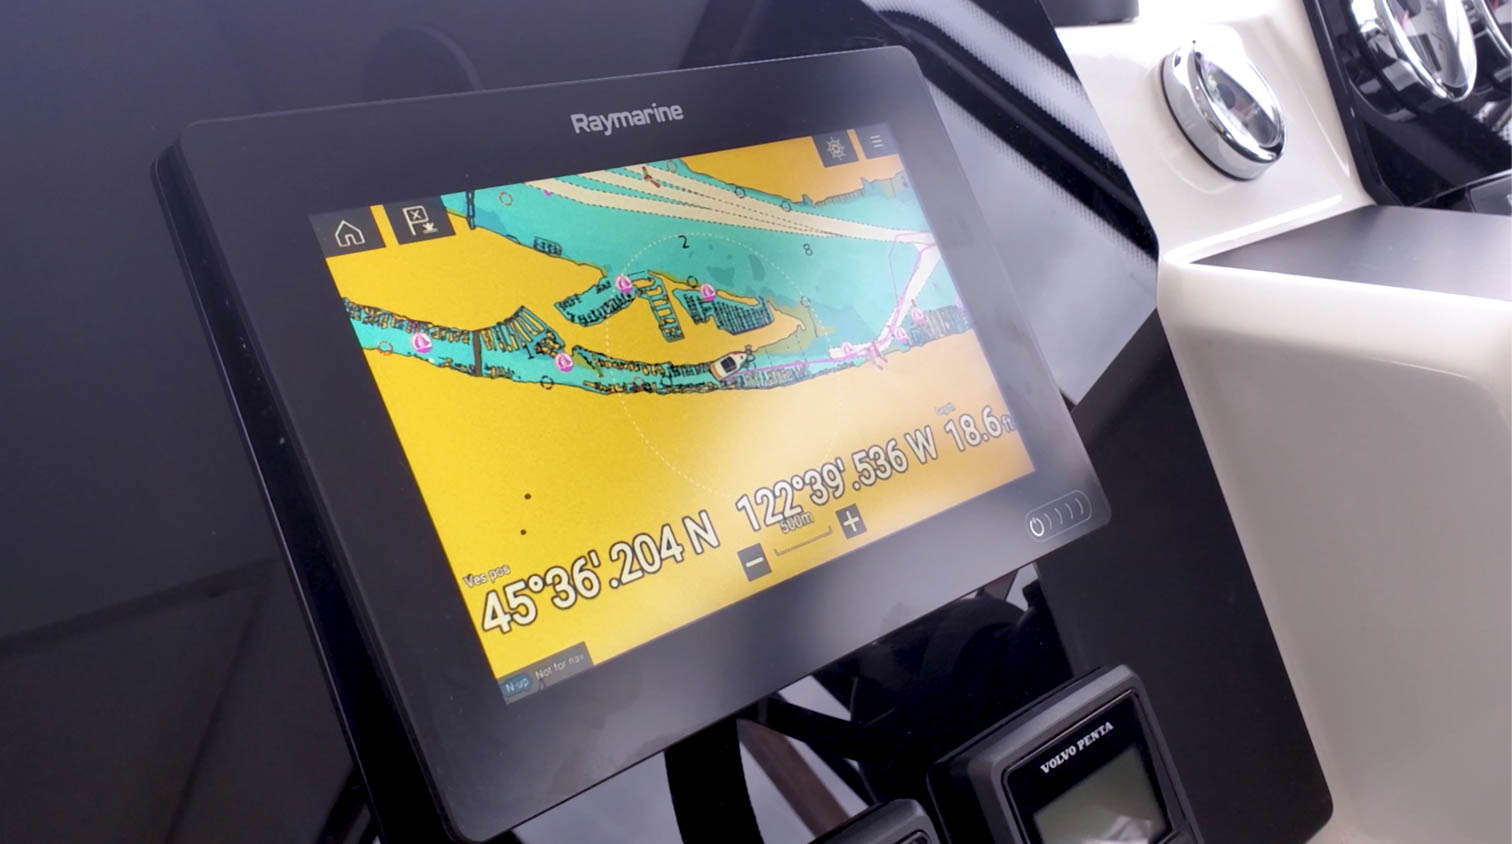
Screenshot 1 – San Juan Islands, Washington
The Navionics ChartViewer gives you access to detailed marine charts, points of interest like marinas and fuel, auto and manual route creation, and distance/speed/fuel consumption calculations. I’m going to share some of the features that I found to be useful. This isn’t intended to be an exhaustive how-to, but just enough to get your feet wet while we’re all stuck high and dry at home.
Auto and Manual Route Guidance
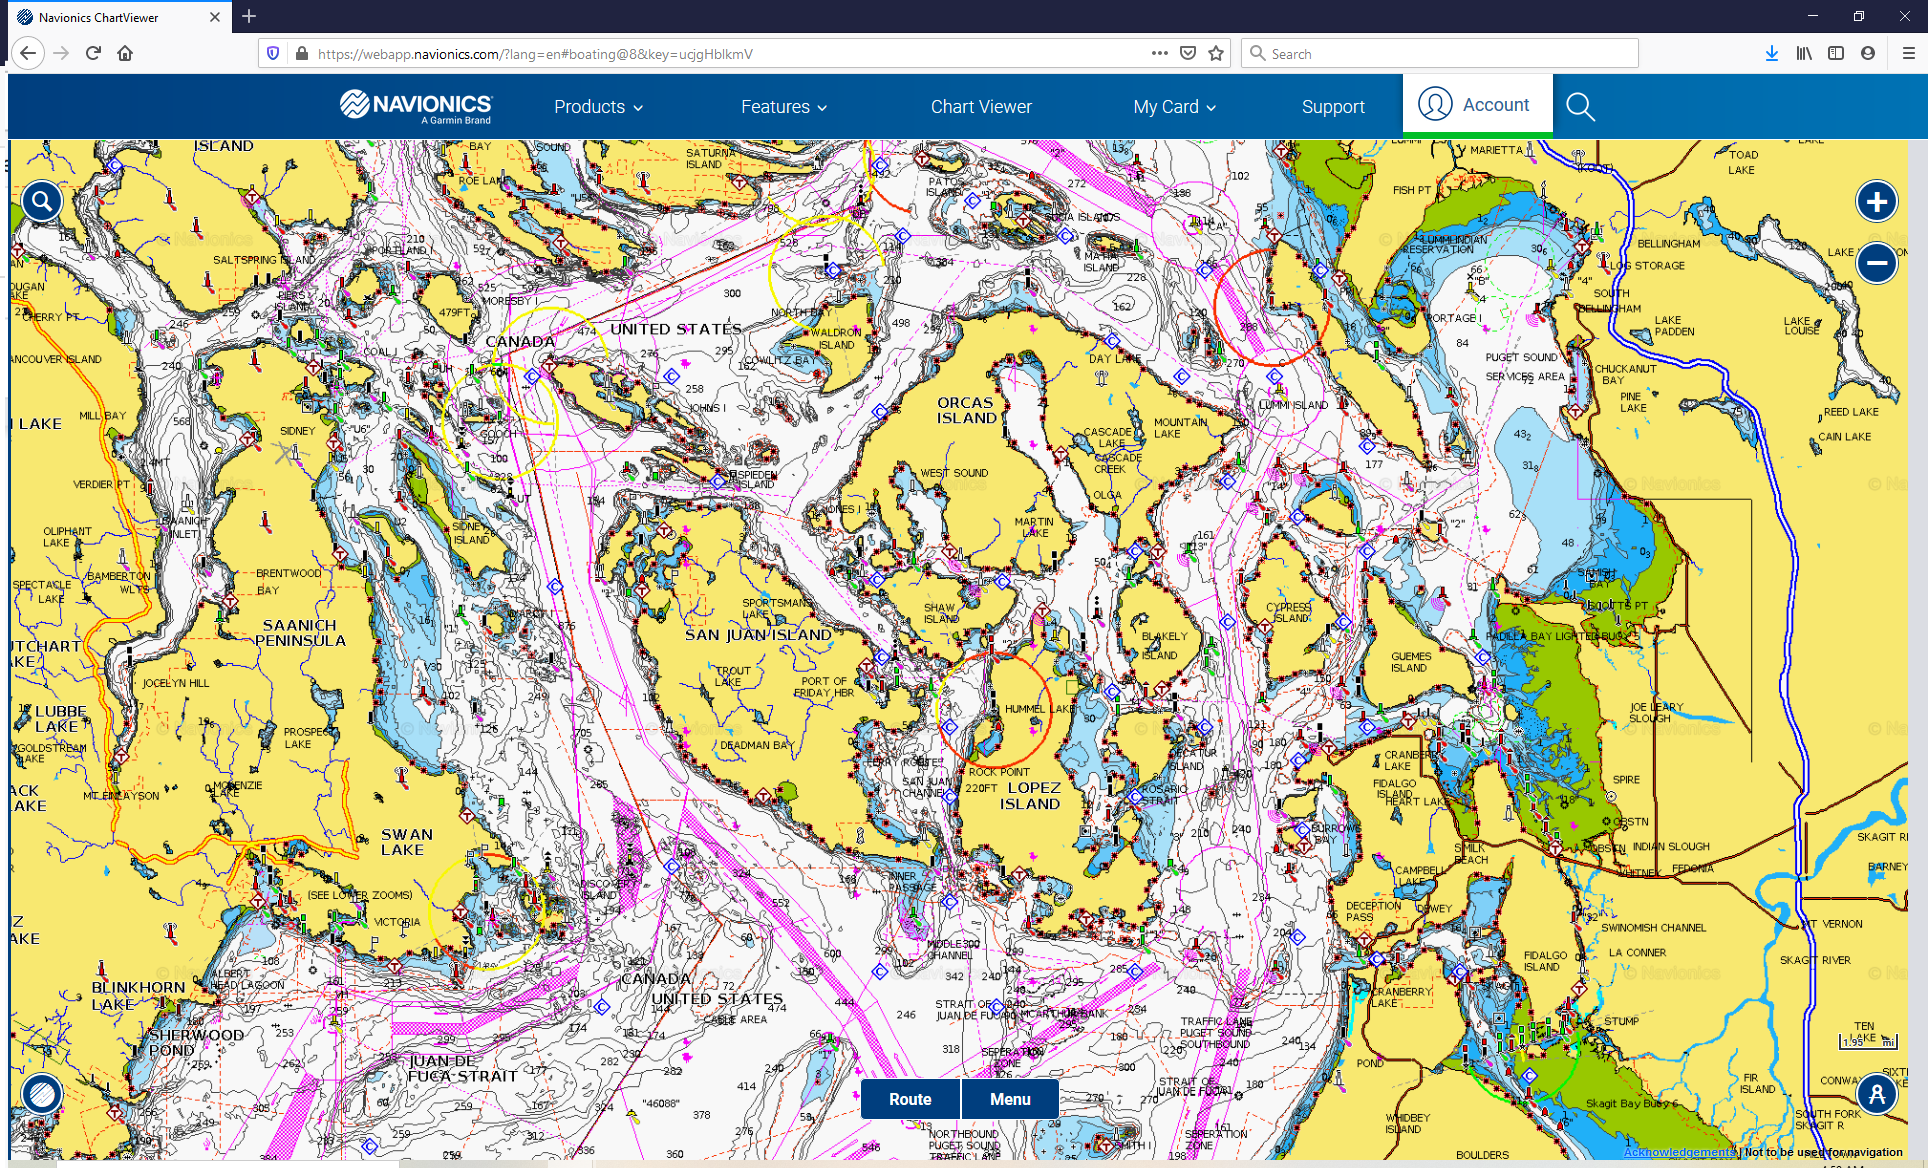
Screenshot 2 – Route from Ballard Locks to Sucia Island
In Screenshot 2 you can see an auto route I created from Ballard Locks to Sucia Island with one extra waypoint I added to route us through Deception Pass instead of Admiralty Inlet (which it defaulted to)
Creating a route is very easy:
- Pan and zoom to the approximate location you’re boating
- Click “Route” then “automatic” or “manual”
- If you select automatic, you can then click on your start location and finish location and Navionics will automatically create the route for you taking into consideration land masses and depth. It will probably prompt you to enter the draft of your boat for this.
- If you select manual then you’ll be able to click point-to-point to create your route.
- You can create more complex routes by clicking the chart to add more waypoints along your journey (including in auto mode).
It takes a few seconds for the app to calculate the auto routes. Once your route is created Navionics will show you travel time and fuel consumption, both overall and for each leg of your journey if you have more than one. This info is in the pane on the left side of your screen, as seen in Screenshot 2.
Enter Boat Settings for Trip Duration, Fuel Burn, Route Guidance
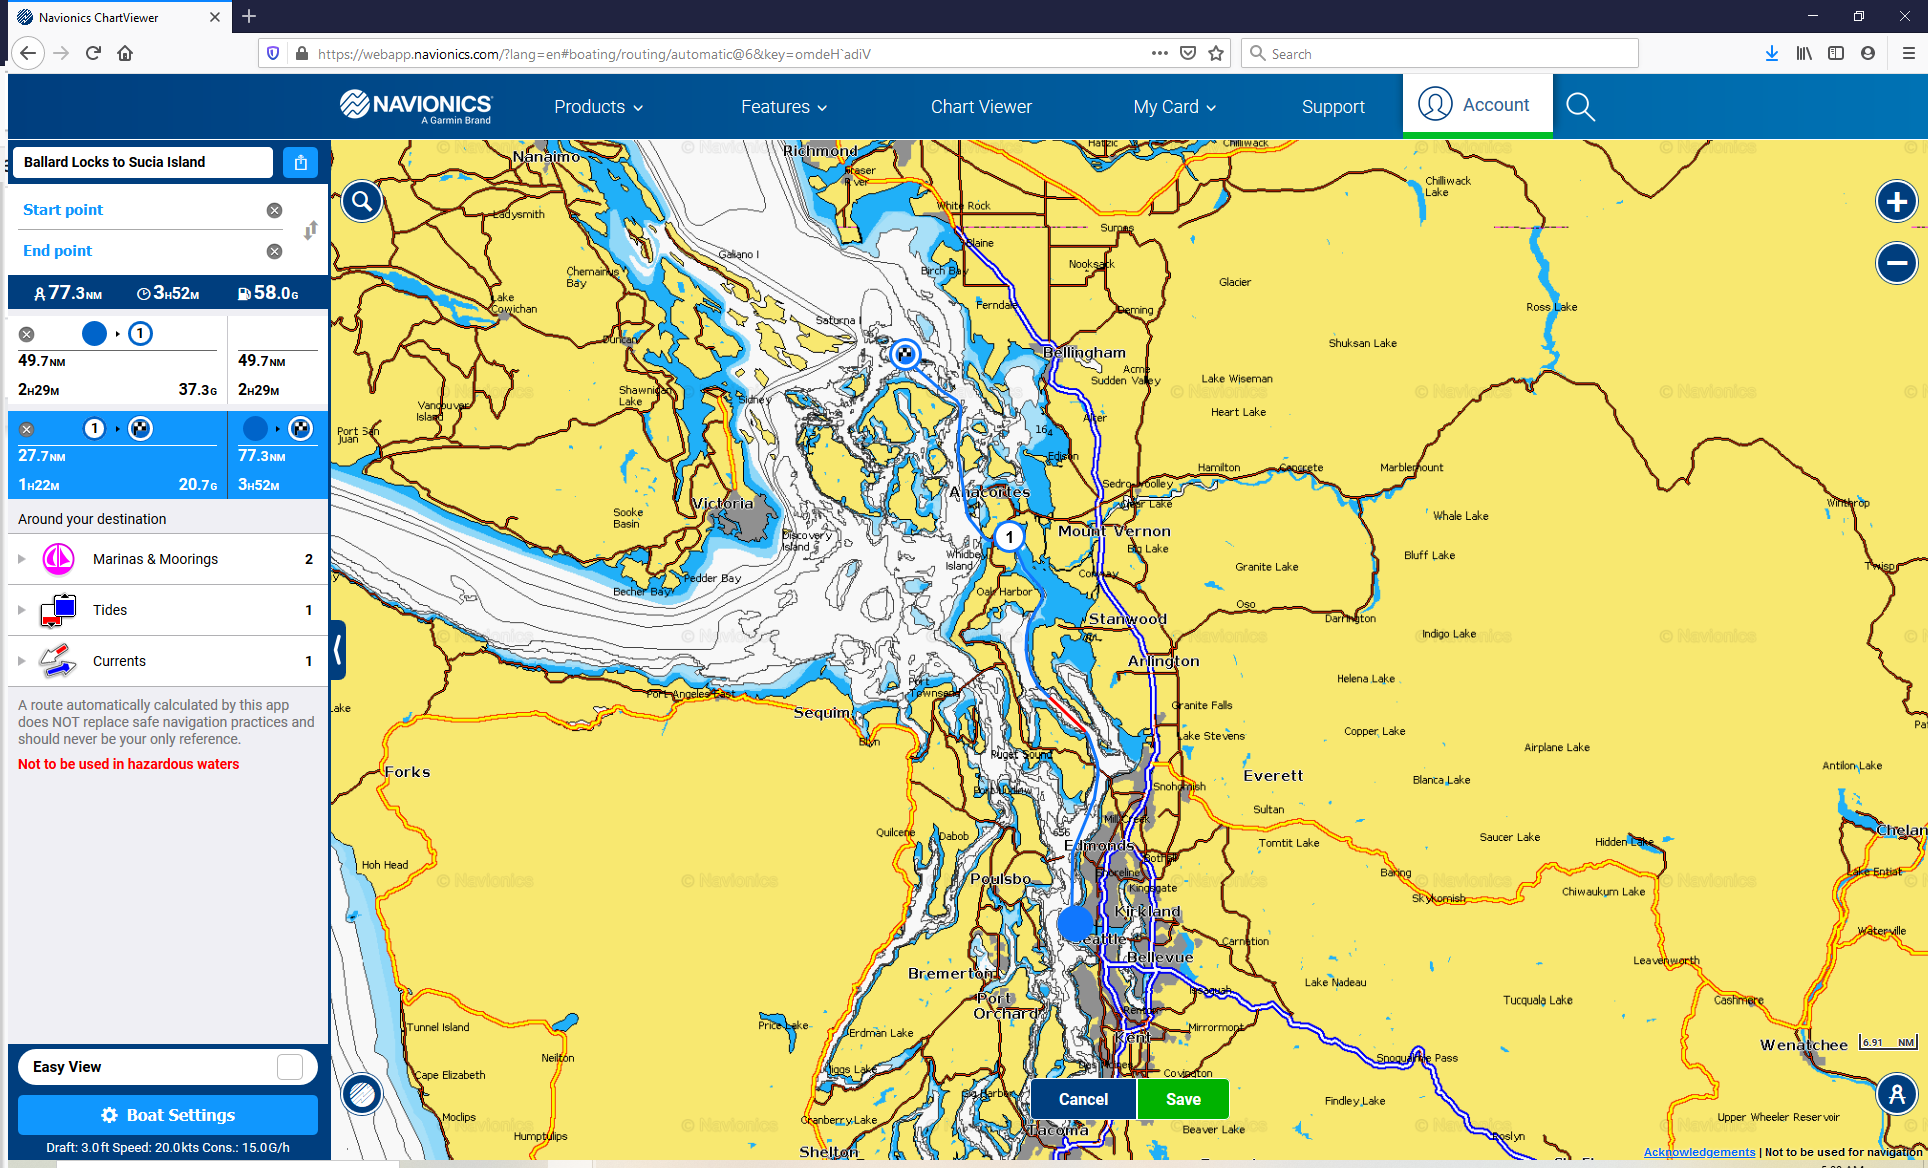
Screenshot 3 - Boat settings (left) and Bonneville Locks
When you create your first auto route the ChartViewer will probably prompt you to enter the draft of your boat. This is so your draft can be taken into consideration along with water depth when calculating your route.
You’ll also want to enter your approximate cruise speed and fuel consumption so that the app can calculate the duration of your trip and total fuel burn.
You can change these settings at any time and your route will recalculate with the new values. You can access “Boat Settings” from the lower left of your screen when you’re in either route mode: auto or manual.
Points of Interest (POIs) Around Your Destination
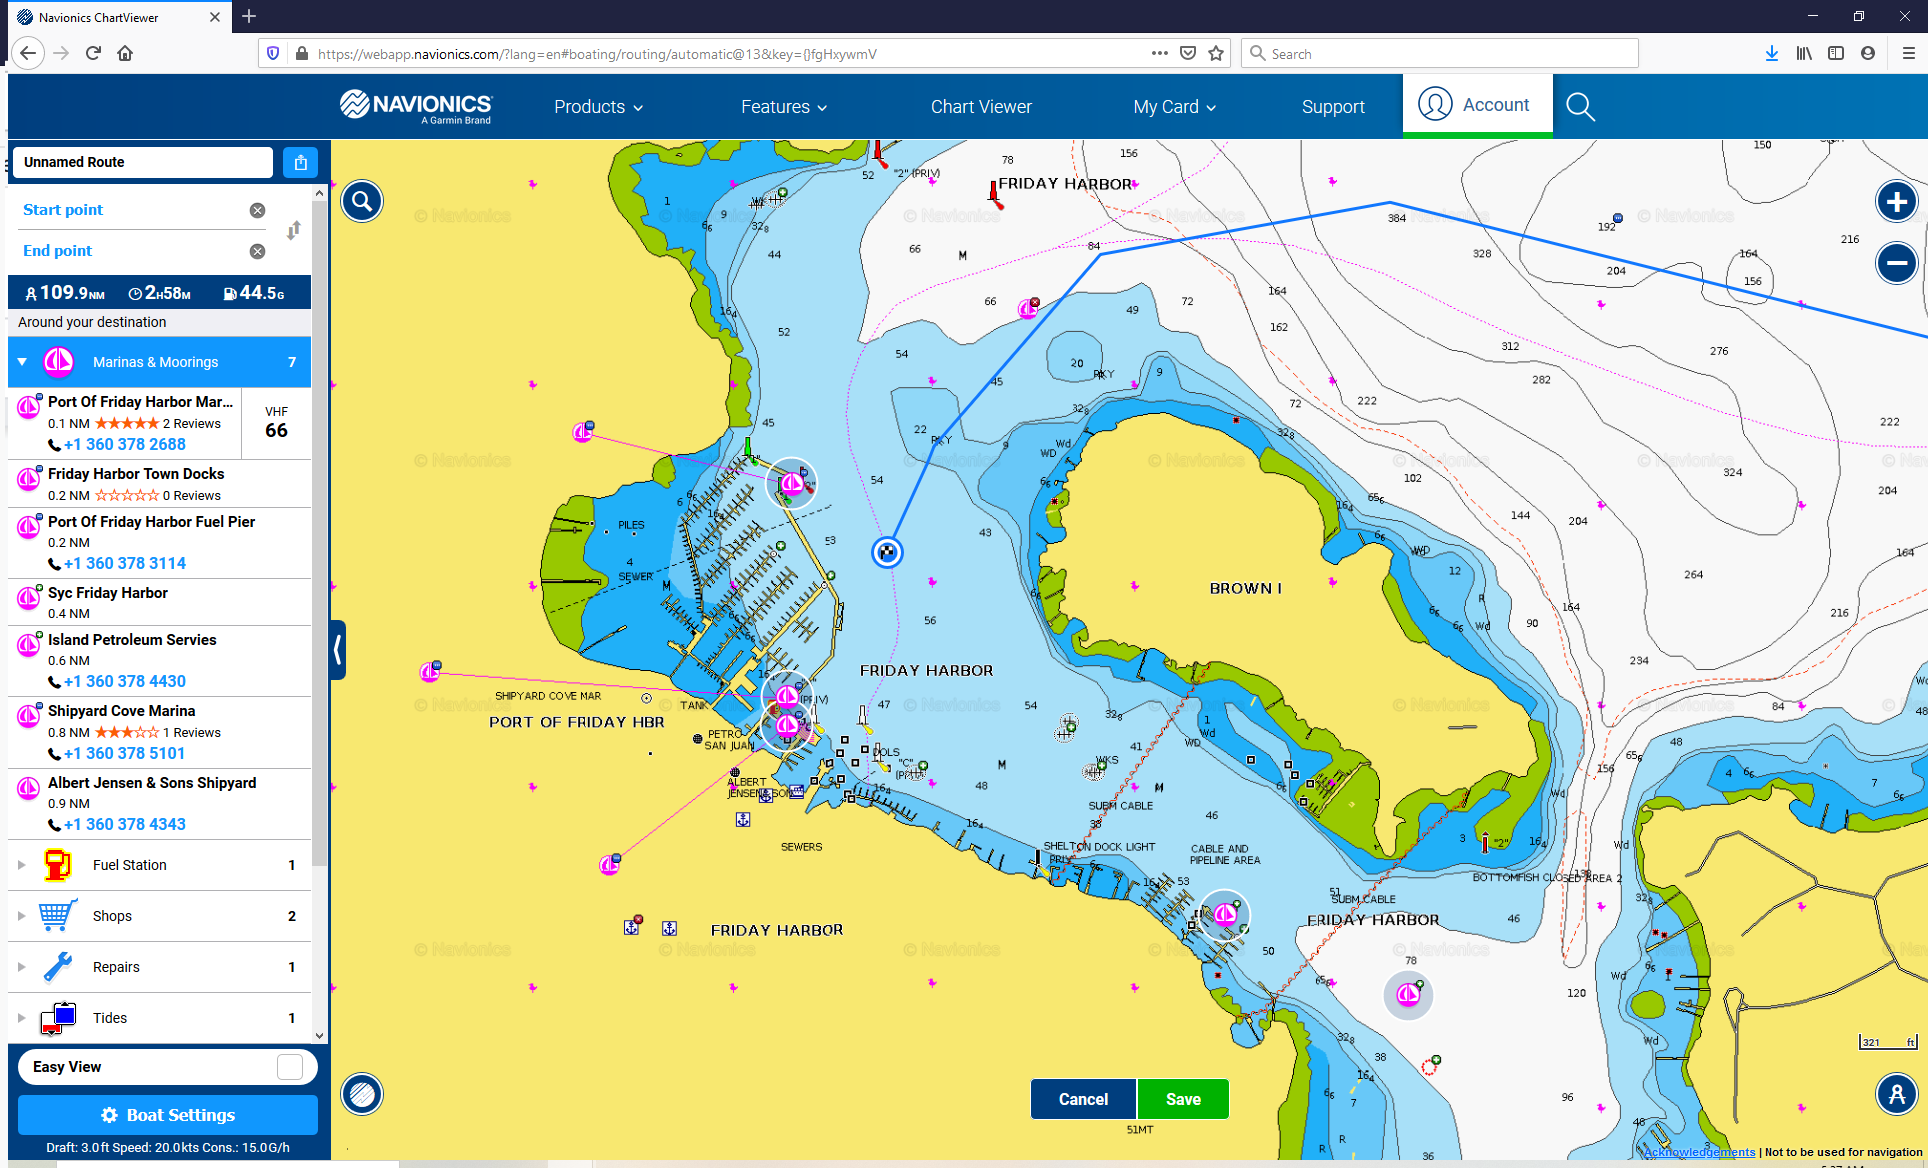
Screenshot 4 - Listing of Marina POIs @ Friday Harbor
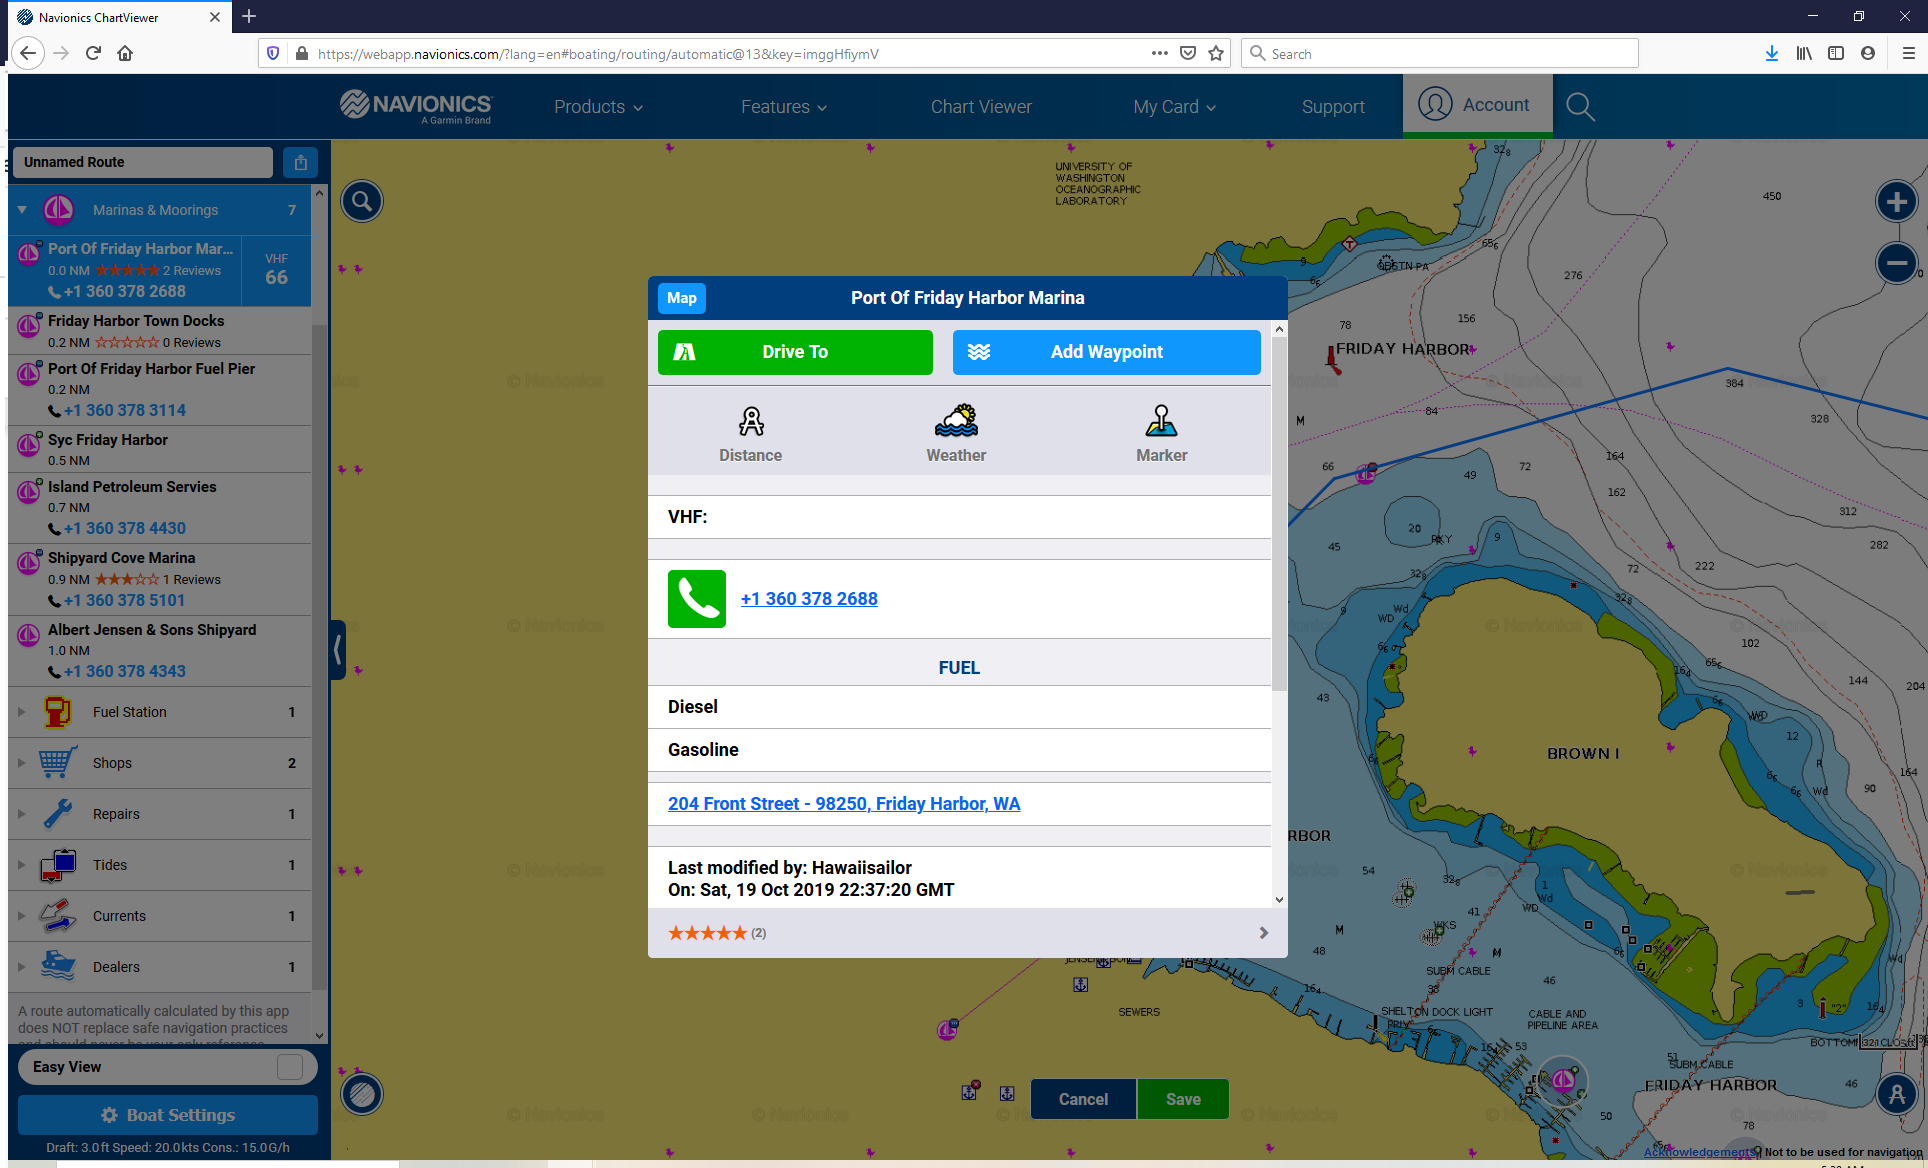
Screenshot 5 - Detailed POI overlay shown when POI tooltip clicked
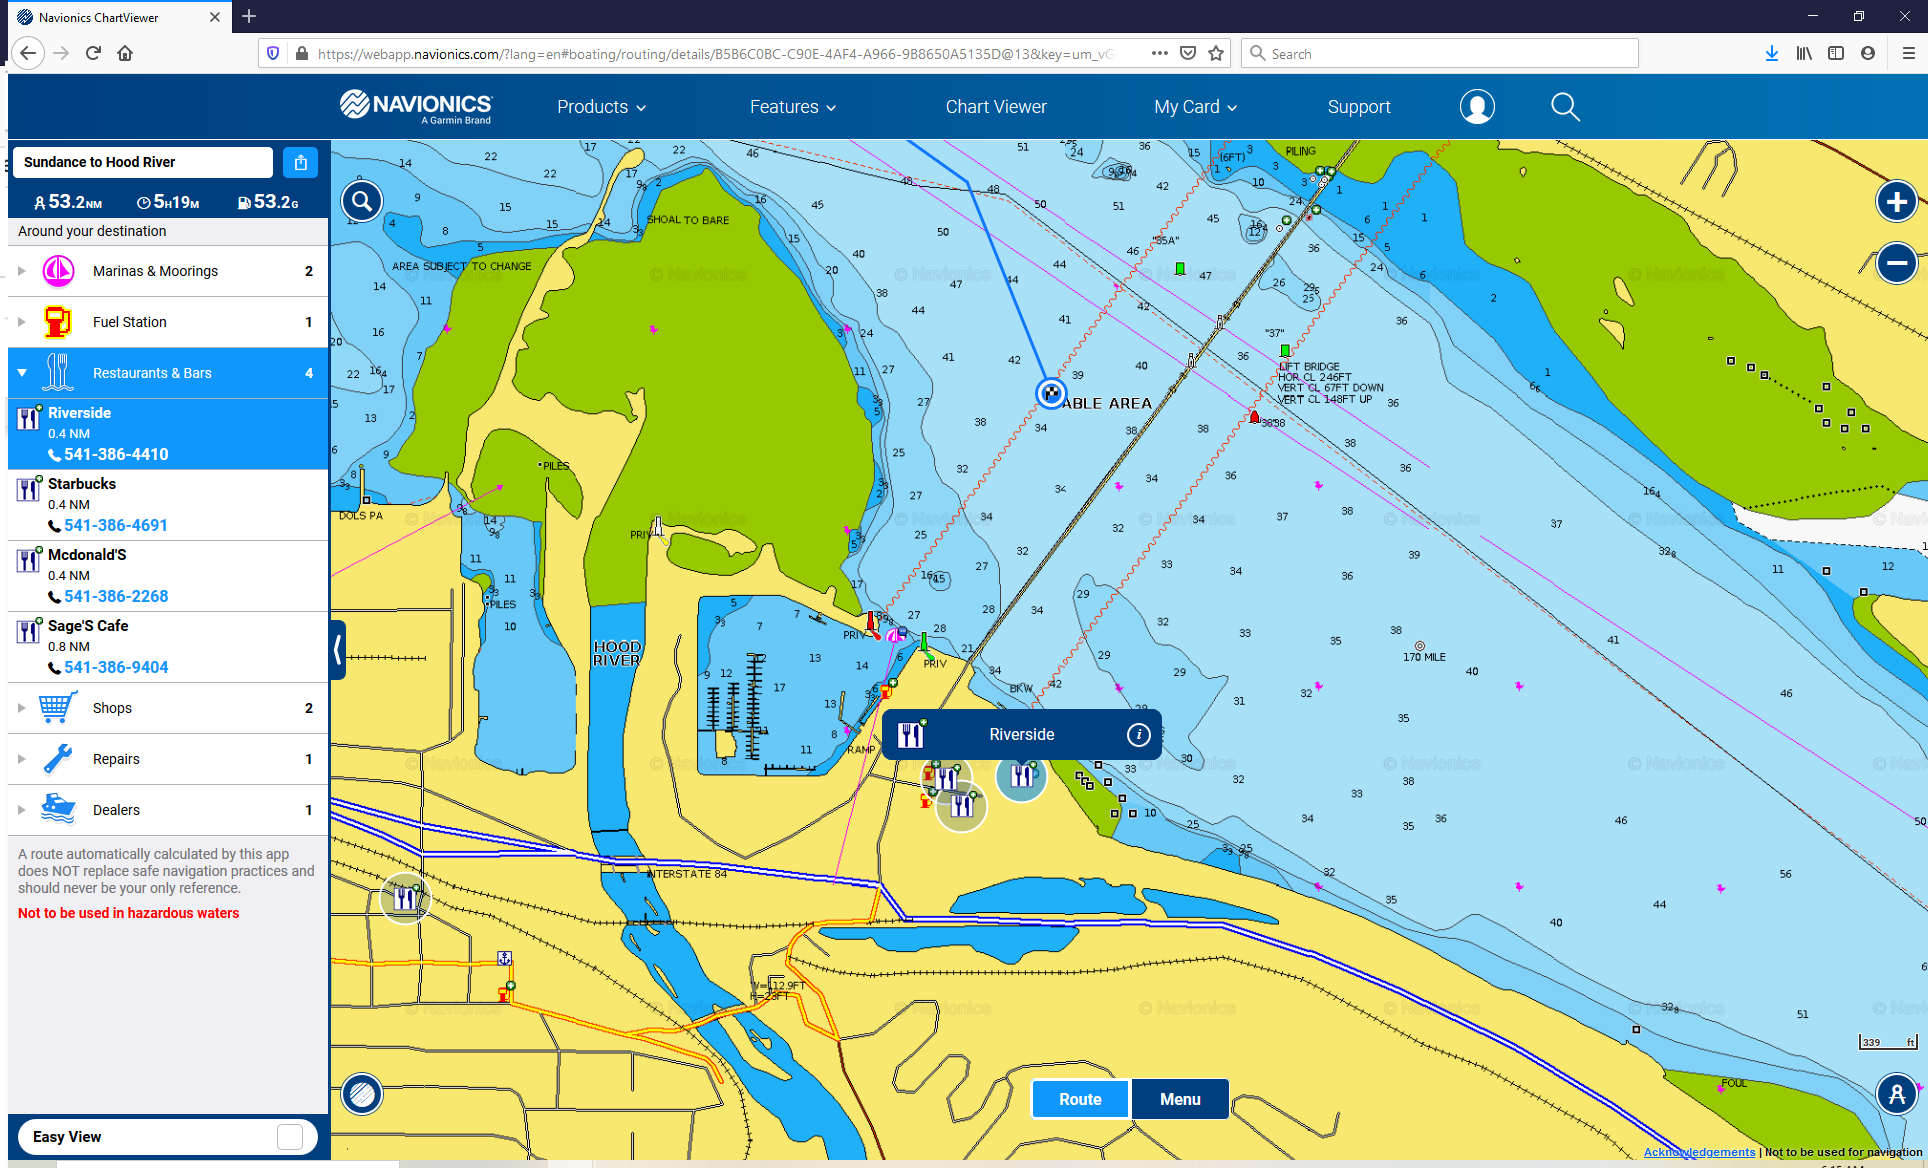
Screenshot 6 - Restaurants nearby in Hood River, Oregon
One of the powerful features of this tool is the ability to figure out what services and resources are available at your destination. When you zoom in on the chart you can see icons that you can click on for more information, including:
- Marinas
- Fuel
- Food
- Marine service and repair
- Boat dealerships
- Marine stores
When you’re viewing a route you’ll see a pane on the left side of the screen with “Around your destination” POIs. The POIs are broken down by category. When you click on an individual POI in the pane on the left it will highlight it on the chart with a tooltip popup. If you click on the tooltip on the chart it will bring up a more detailed view of that POI.
You can also create a route by clicking a POI on the chart and selecting “Boat To” in the detailed POI overlay.
Create an Account to Save Routes for Future Reference
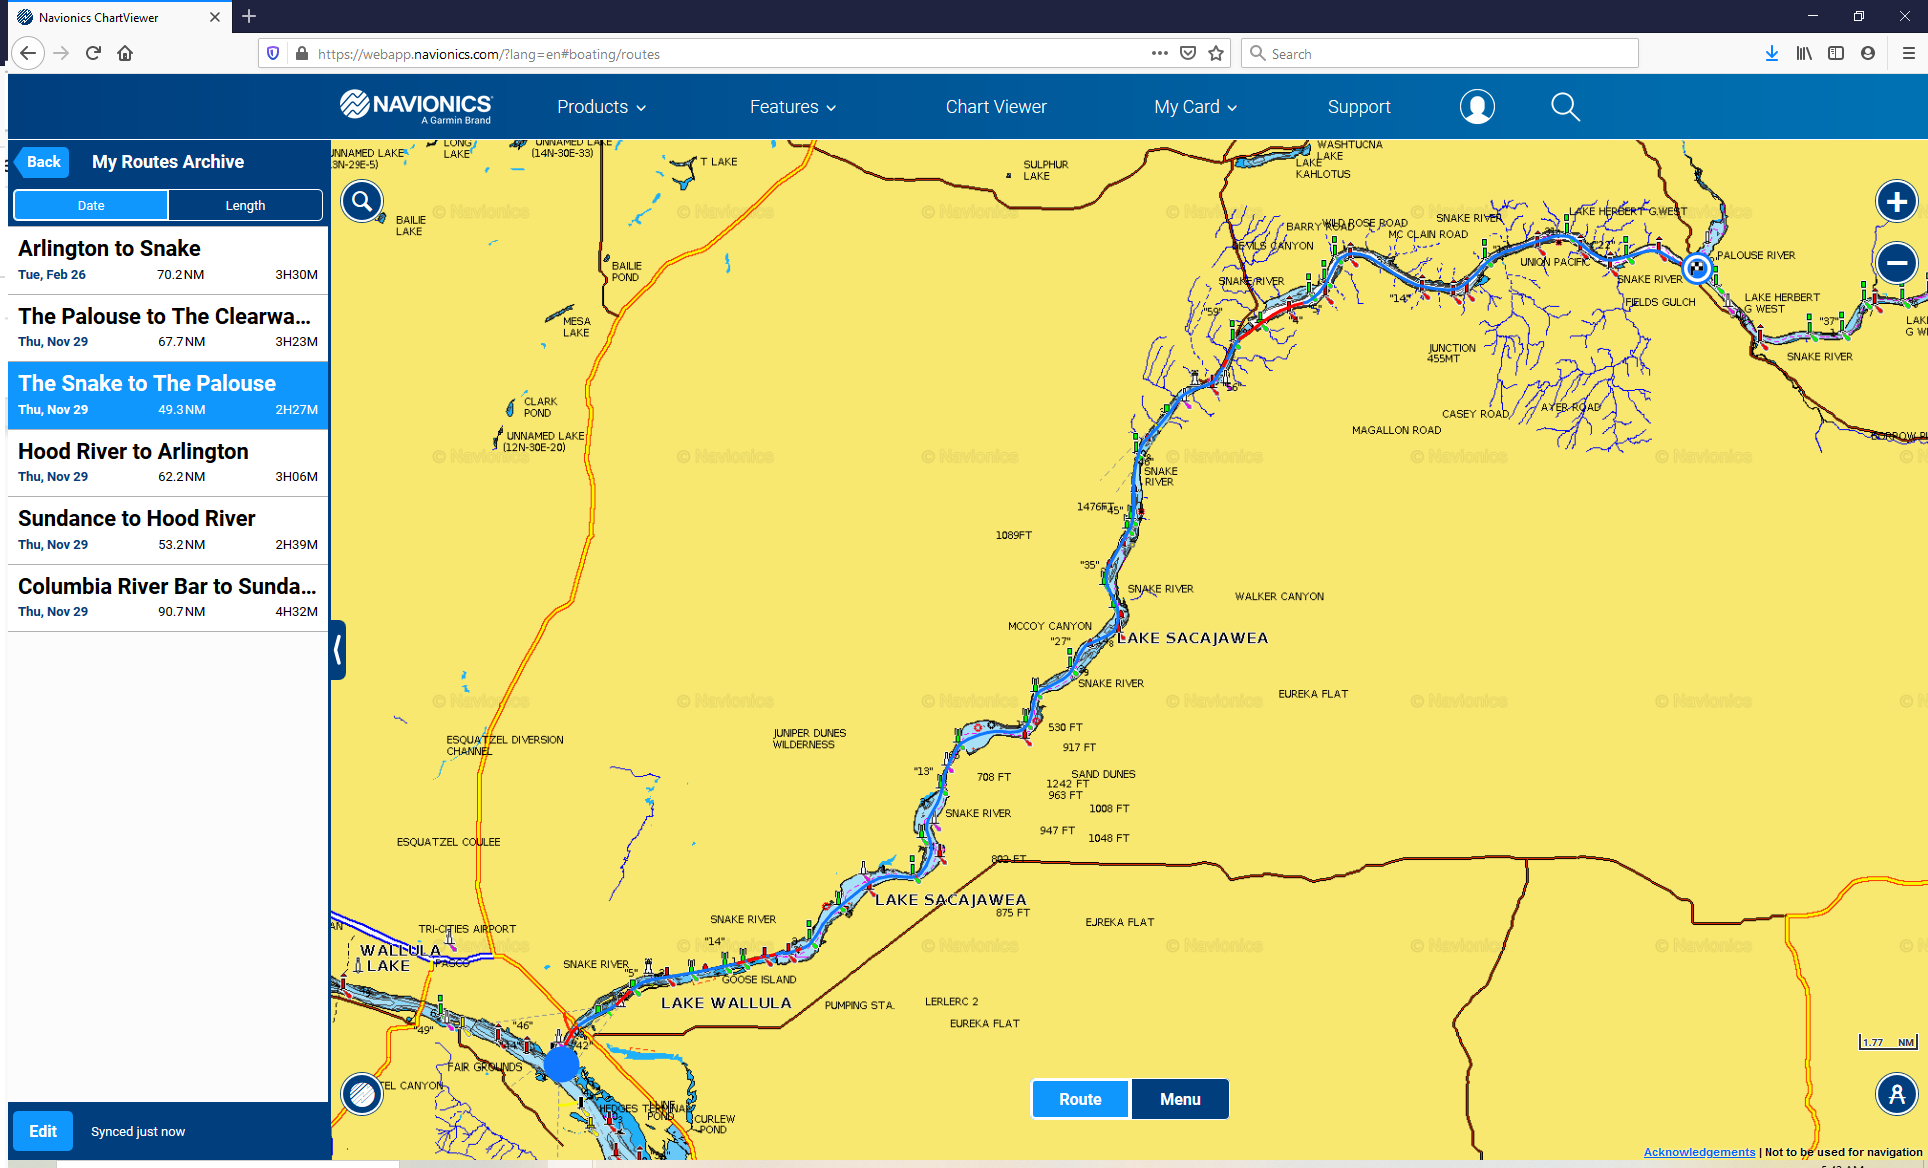
Screenshot 7 - List of saved routes (left) Snake River (right)
If you spend much time creating a route you’ll probably want to save it. You can create a free account that you can save routes to so you can come back to them later. I noticed it doesn’t seem to want to save my boat settings, but that’s OK - the routes I’ve built are what are important to me. The boat settings are easy to change at each login.
If you’re reading this post on a platform where you can add comments - please do! Did I miss anything? What resources have you found that are helpful for trip planning?
That’s it for now! See you on the water - soon!
– Nick Buck-Niehaus